Recently Ajay D’Souza asked how we made our author archive pages here on BloggingPro. I personally am a big fan of displaying content differently on different sections of blogs and also think that archives should be more informative than be just a collection of excerpts.
Because I personally believe that an ‘Author Information’ block below every entry overkill is, the author archive is the right spot to display more information about every author and also display the entries written by authors in a short and concise way.
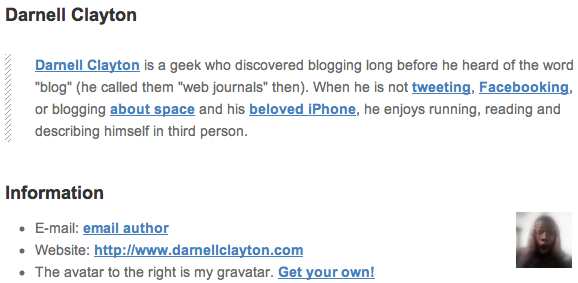
Part 1: Adding The Author Description and Gravatar
Creating customised author pages is really simple. Other than some CSS customisation the code for the author description is entirely provided by known and documented WordPress template tags and information gathered from the author profile.
First we need of course a author.php template for this to work and you need to make sure that every author fills in their profile. The code used in following code samples is backwards compatible (to WP1.2!) and makes use of the $ curauth functions documented in the WordPress Codex Author Templates. The email address is protected from spam harvesters.
[php]
<p class="listhead">You’re in the <b>Author Archive</b></p>
<!– This sets the $curauth variable –>
<?php
if(isset($_GET[‘author_name’])) :
$curauth = get_userdatabylogin($author_name);
else :
$curauth = get_userdata(intval($author));
endif;
?>
<div class="post">
<h2><?php echo $curauth->first_name; ?> <?php echo $curauth->last_name; ?></h2>
<blockquote><?php echo $curauth->user_description; ?></blockquote>
<h3>Information</h3>
<div class="right"><?php echo get_avatar( $curauth->user_email, ’56’ ); ?></div>
<ul>
<li>E-mail: <strong><a href="mailto:<?php echo antispambot($curauth->user_email); ?>">email author</a></strong></li>
<li>Website: <strong><a href="<?php echo $curauth->user_url; ?>"><?php echo $curauth->user_url; ?></a></strong></li>
<li>The avatar to the right is my gravatar. <a href="http://gravatar.com" title="Get your own!">Get your own!</a></li>
</ul>
[/php]
You can now easily style this further with CSS.
Part Two: Adding List of Entries Written by The Author
The second part of the author pages is lots simpler and nothing more than a customised loop. Rather a loop without the excerpts.
[php]
<h3>Browse Updates by The Author</h3>
<ul>
<!– The Loop –>
<?php if ( have_posts() ) : while ( have_posts() ) : the_post(); ?>
<li>
<strong><a href="<?php the_permalink() ?>" rel="bookmark" title="<?php the_title(); ?>"><?php the_title(); ?></a></strong><br />
<small>Filed as <?php the_category(‘, ‘); ?> on <?php the_time(‘j/n Y’); ?> <?php the_time(‘H:i’); ?> with <?php comments_popup_link(‘no comments’, ‘1 comment’, ‘% comments’); ?></small>
</li>
<?php endwhile; ?>
</ul>
[/php]
That’s It. Almost
All there is left to do now is to add the Previous/Next navigation and provide a fallback option for when the author hasn’t published any entries yet.
[php]
<div class="navigation">
<div class="left"><?php next_posts_link(‘← Previous Entries’) ?></div>
<div class="right"><?php previous_posts_link(‘Next Entries →’) ?></div>
</div>
<?php else: ?>
<p><?php _e(‘No posts published yet!’); ?></p>
<?php endif; ?>
<!– End Loop –>
</div>
[/php]
It’s as simple as this. You can see the result on my BloggingPro author page.
